Plugin for VSCode (Cline)
Detailed Guide on Installing and Setting Up Cline in VSCode
Cline is a VSCode plugin that acts as a programming assistant agent. It can help with creating and editing files, executing commands, using the browser, and much more, by asking for your permission at each step.
How to Get Started with Cline?
-
Launch VSCode on your computer
1.1 If VSCode shows "Running extensions might...", click “Allow”;
-
Download Cline
2.1. Go to the Extensions panel in VSCode. The Extensions icon is usually located on the side Activity Bar, or press Cmd+Shift+X (macOS) or Ctrl+Shift+X (Windows/Linux) to open Extensions;
2.2. In the Extensions Marketplace search field, type "Cline";
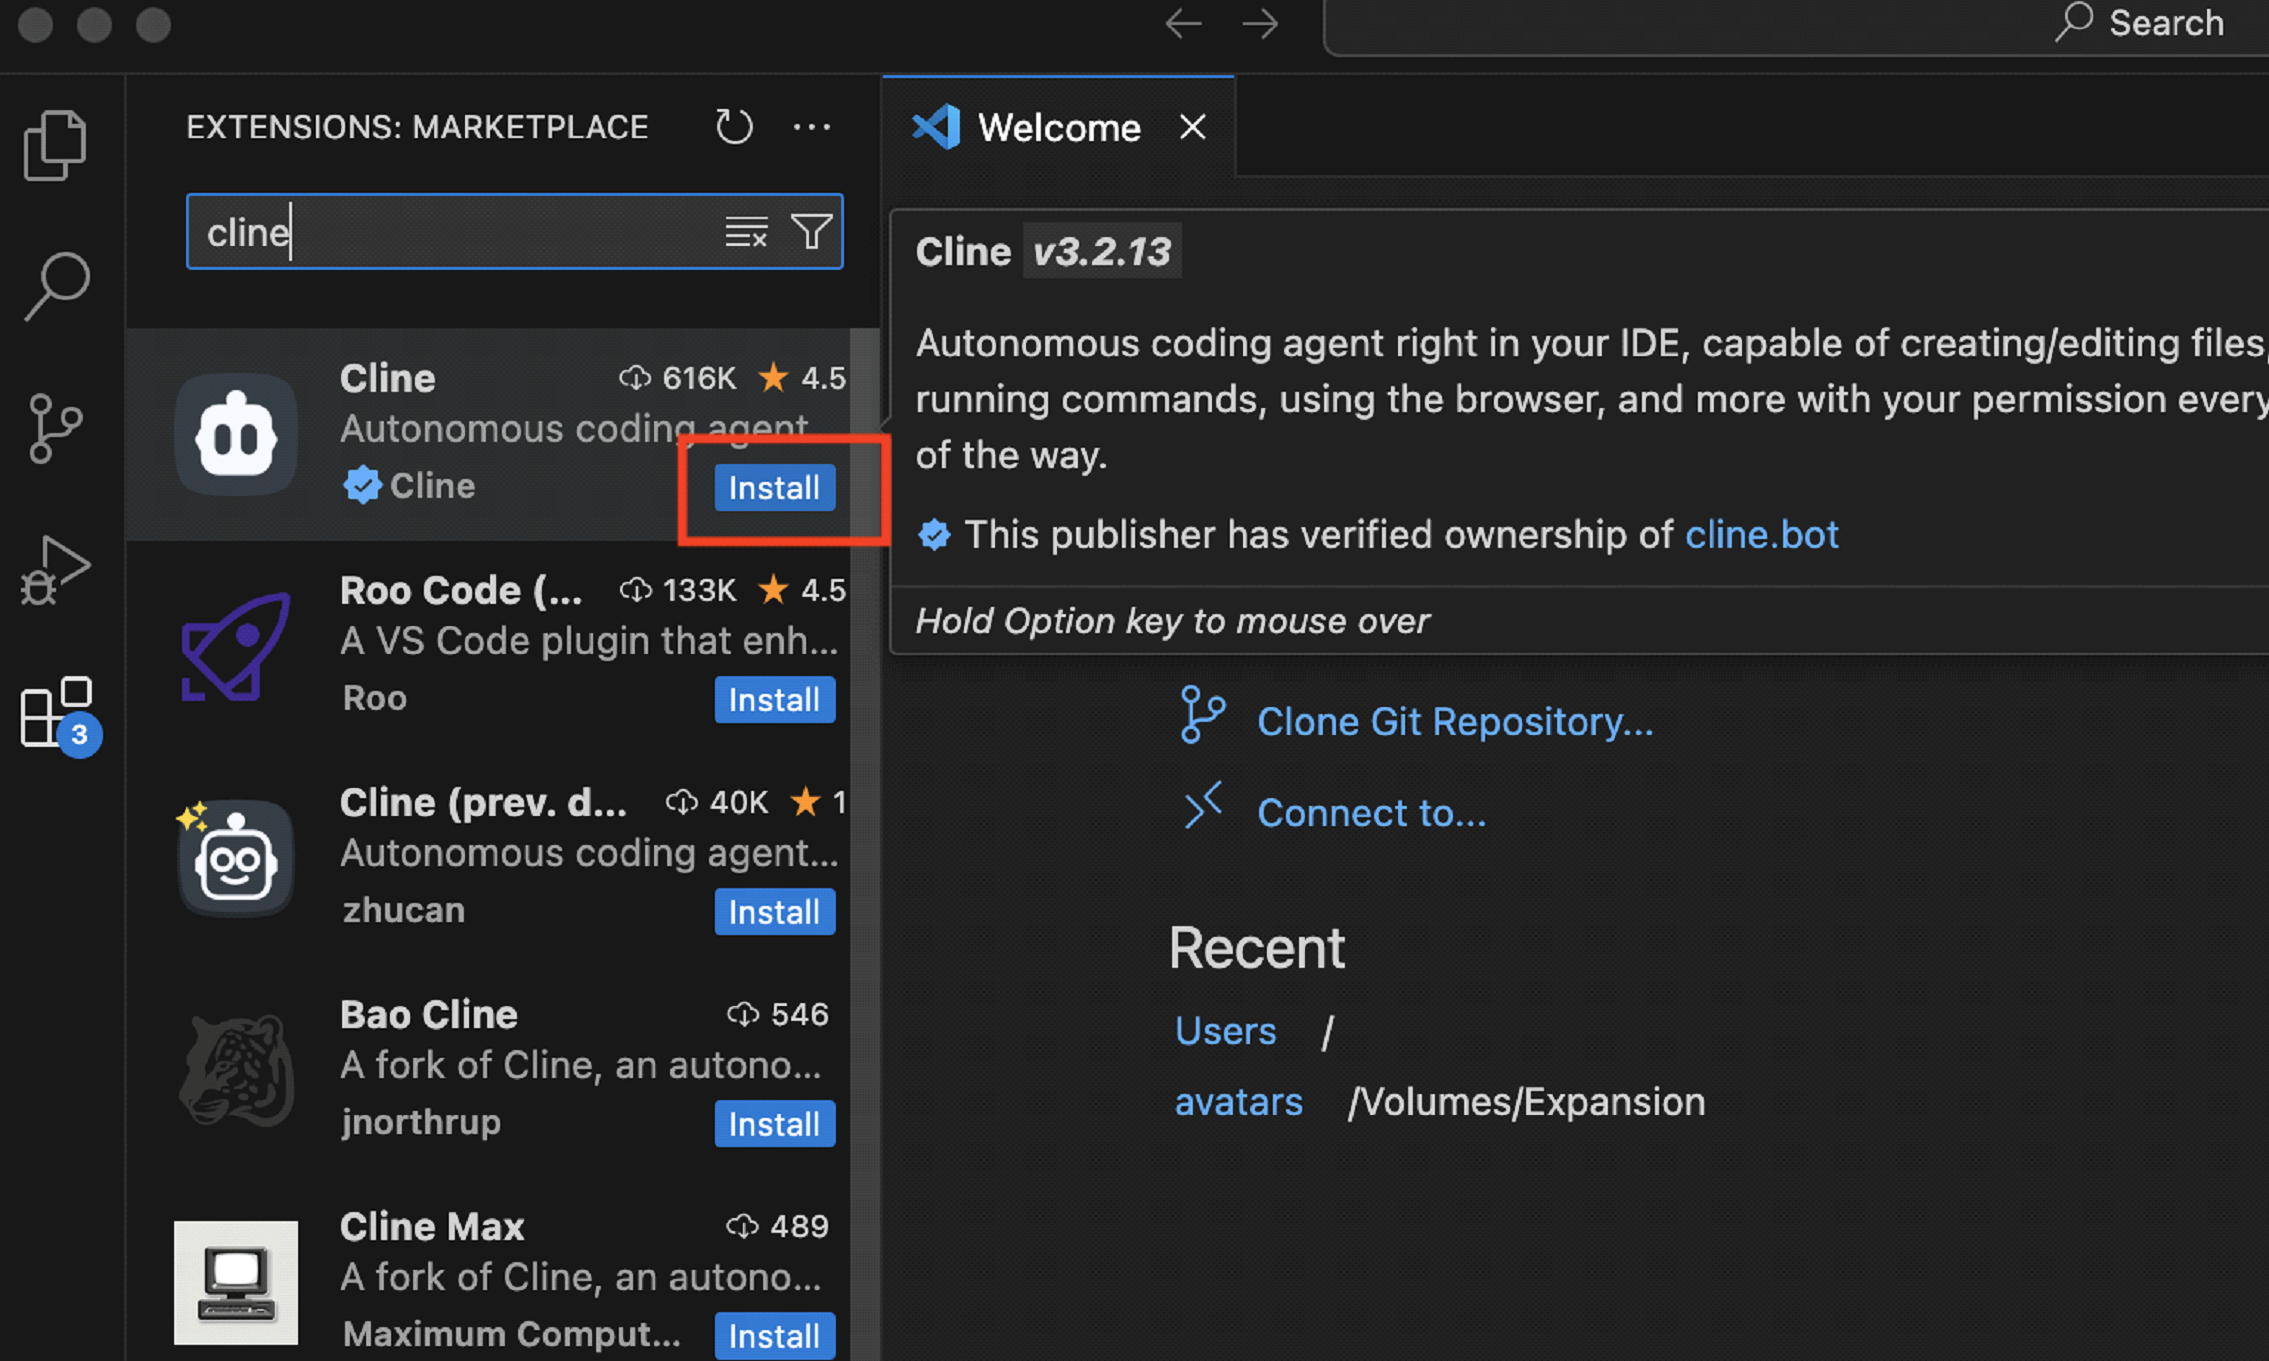
2.3. In the search results, find the Cline extension. Click the "Install" button:
Note: It is recommended to create a separate folder for Cline projects:
- macOS: create a folder named "Cline" in the "Documents" folder (Path: /Users/[username]/Documents/Cline).
- Windows: create a folder named "Cline" in the "Documents" folder (Path: C:\Users[username]\Documents\Cline).
- Inside the "Cline" folder, you can create subfolders for each individual project (e.g., Documents/Cline/first-project).
- Once the folder is created, after launching VSCode, go to the "File" menu -> "Open Folder..." and select "Cline".
-
After installing the Cline extension, there are several ways to open Cline in VSCode:
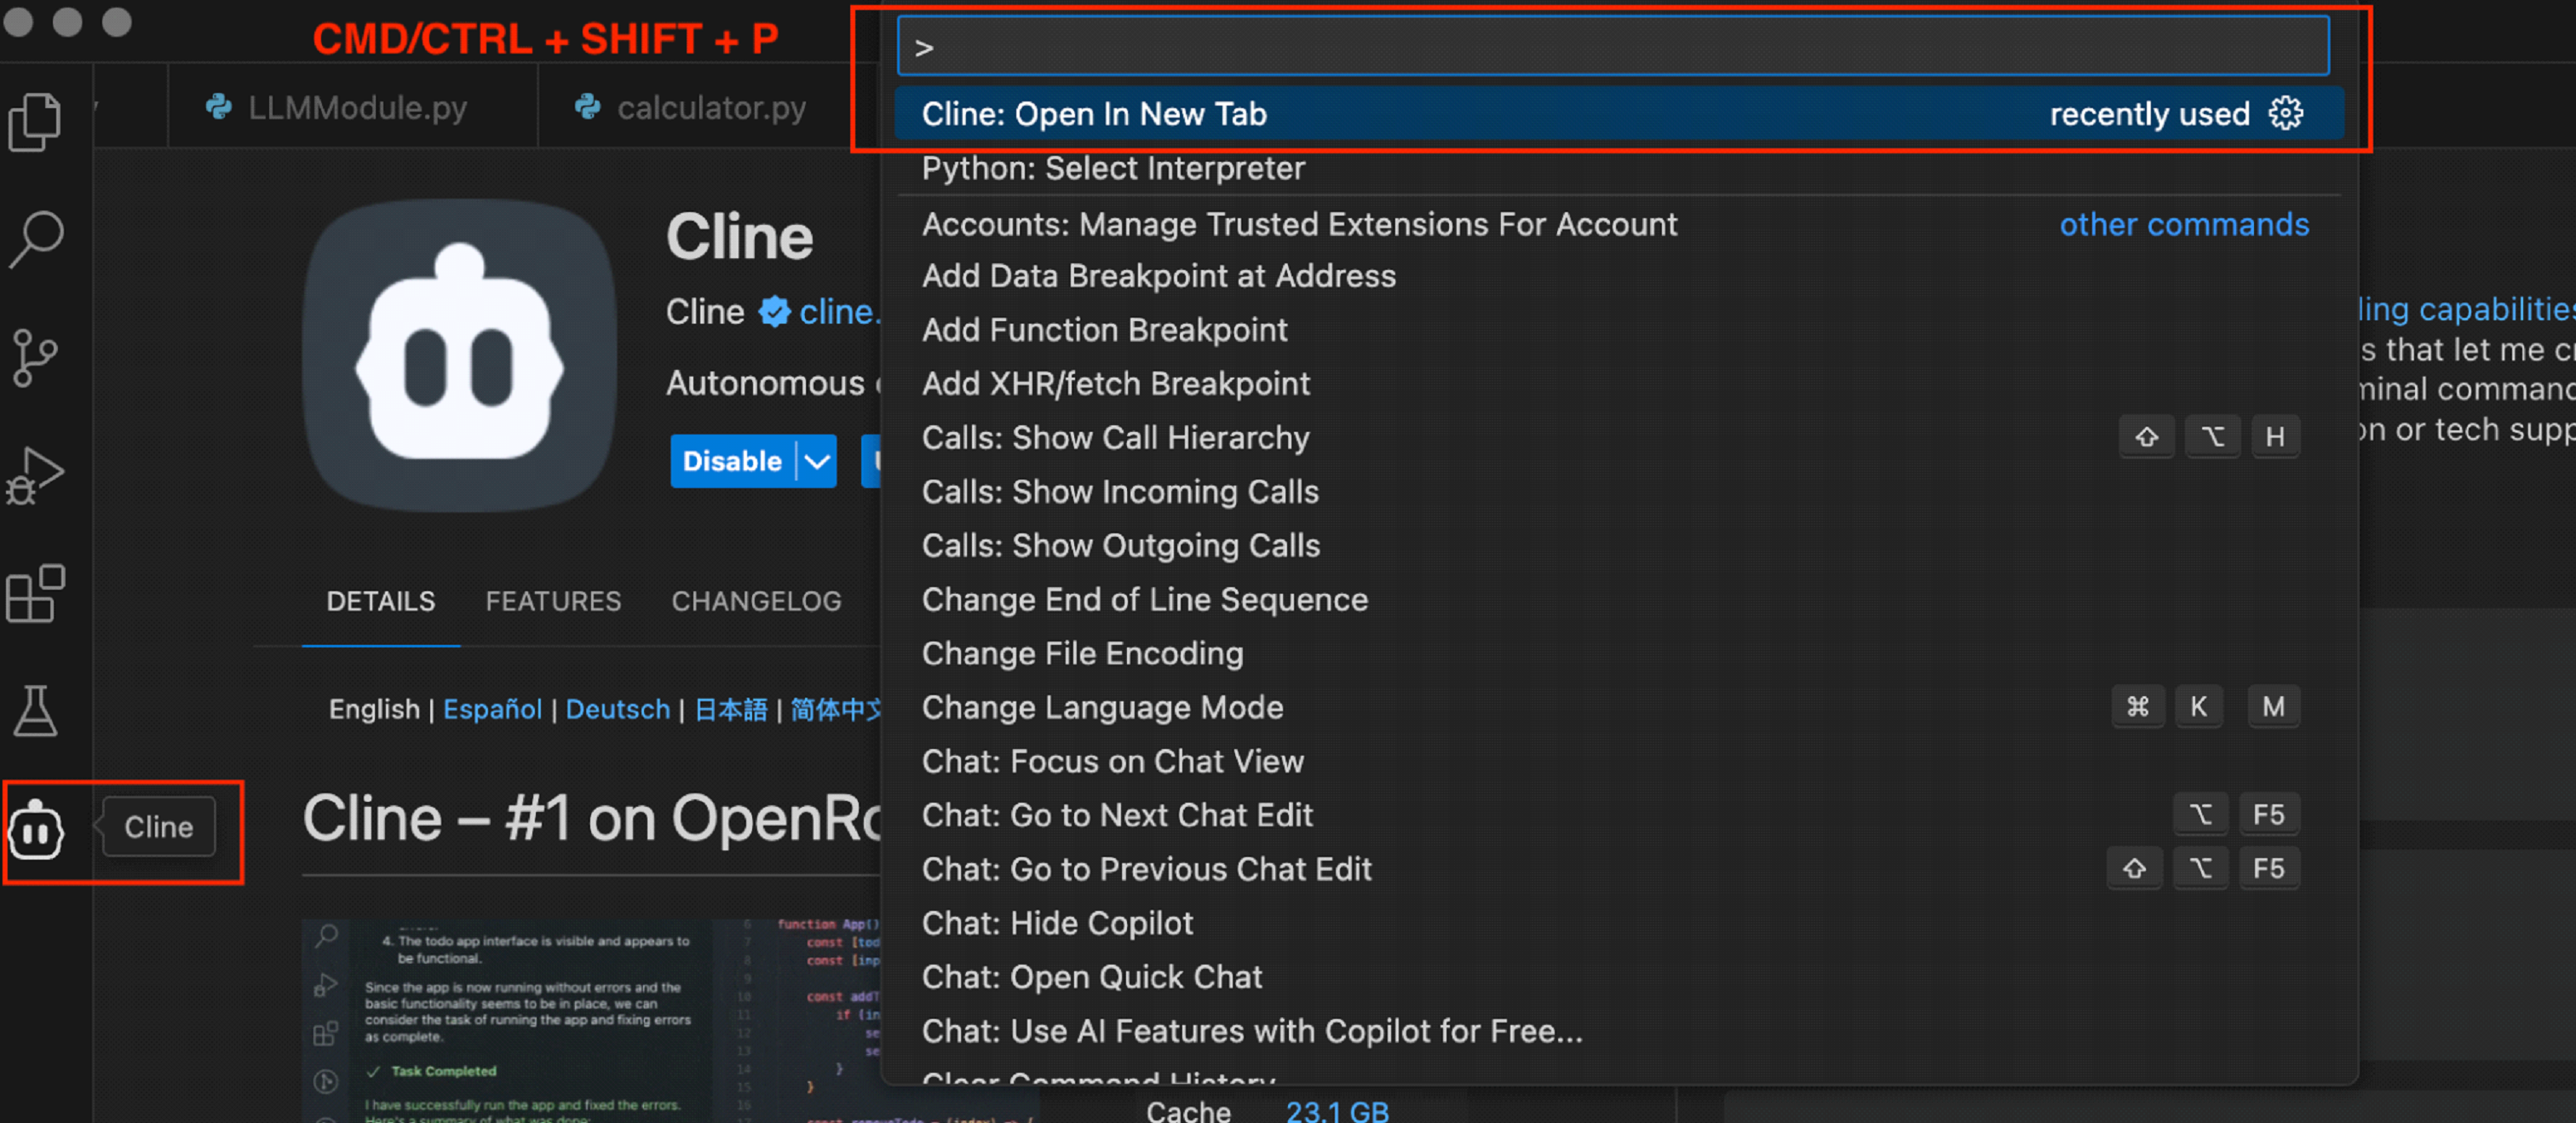
3.1. Cline in Activity Bar: the Cline icon will appear on the Activity Bar. Click on it to open Cline. If the icon does not appear, restart VS Code.
3.2. Command Line:
3.2.1. Press Cmd+Shift+P (macOS) or Ctrl+Shift+P (Windows/Linux) to open the command line.
3.2.2. Type "Cline: Open In New Tab" in the command line to open Cline as a new tab in the editor.
Next, when we first open Cline, we will be prompted to configure it:
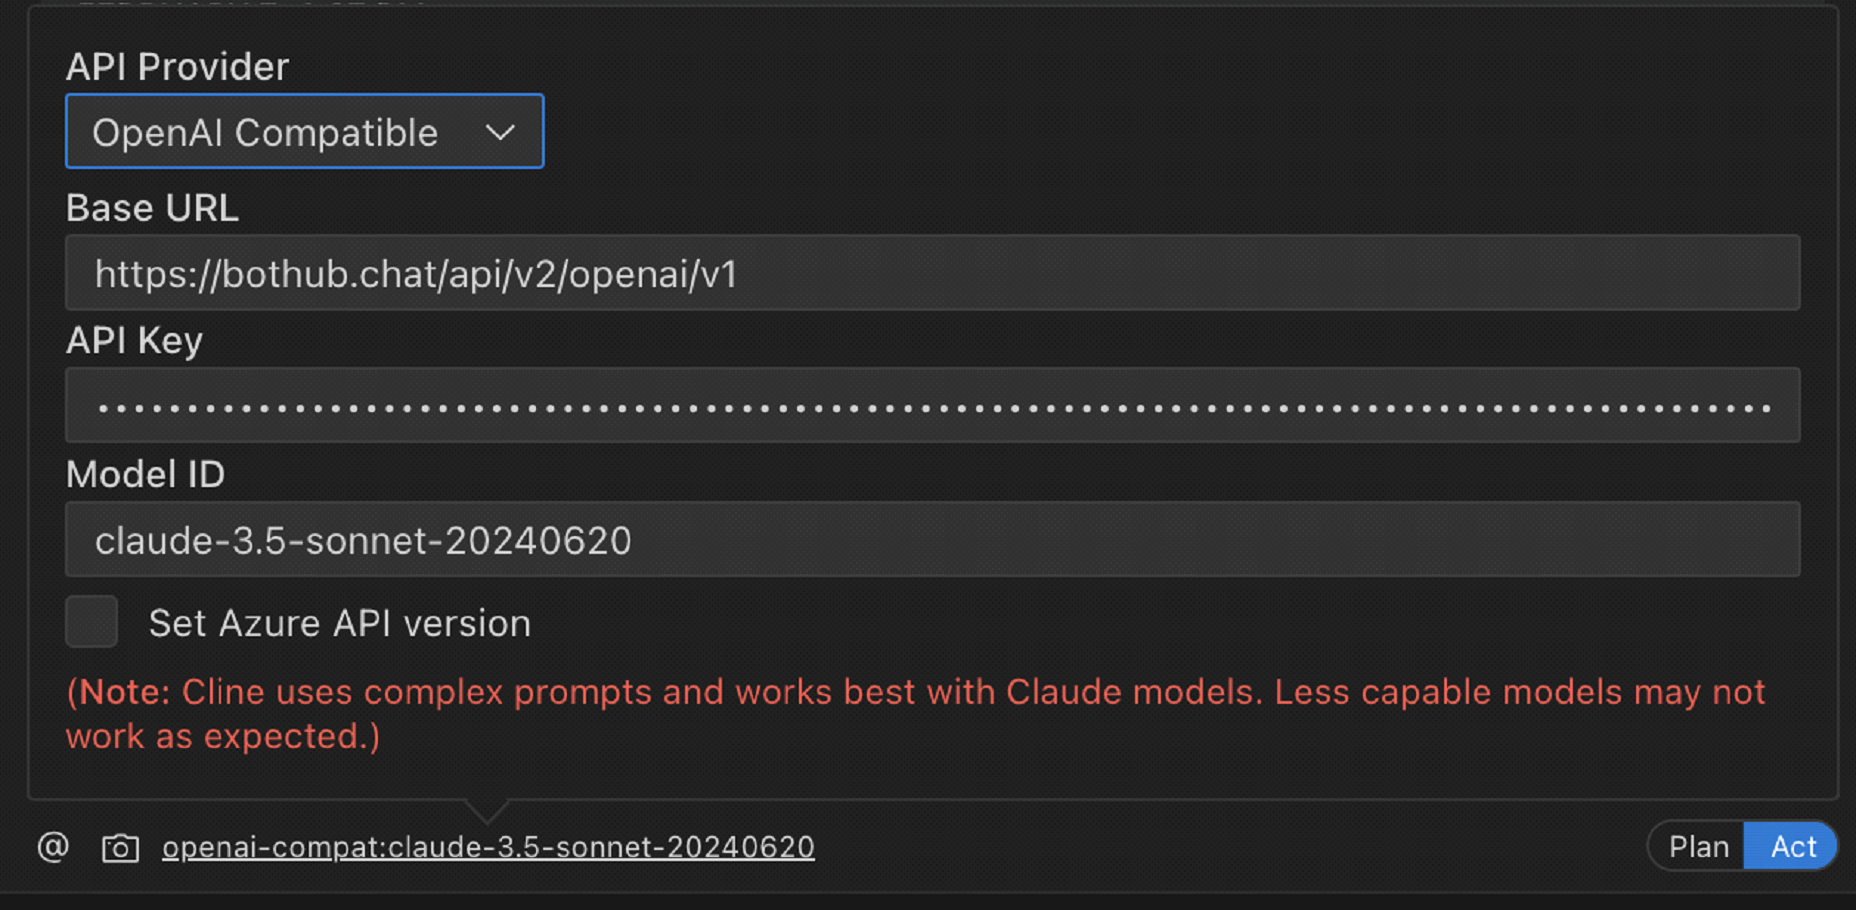
- API Provider: In the "API Provider" dropdown menu, select "OpenAI Compatible" (suitable for compatible APIs, e.g., bothub);
- Base URL: In the "Base URL" field, enter the API Bothub address: https://openai.bothub.chat/v1;
- API Key: You will need an API key from Bothub. Generate it on the page https://bothub.chat/profile/for-developers, copy it, and paste it into the "API Key" field.
- Model ID: In the "Model ID" field, enter the model identifier. A list of models and their IDs is available on the "Models" page: https://bothub.chat/models.
-
After configuring the API, let's test Cline by giving it a simple task. Enter the following request in the Cline chat:
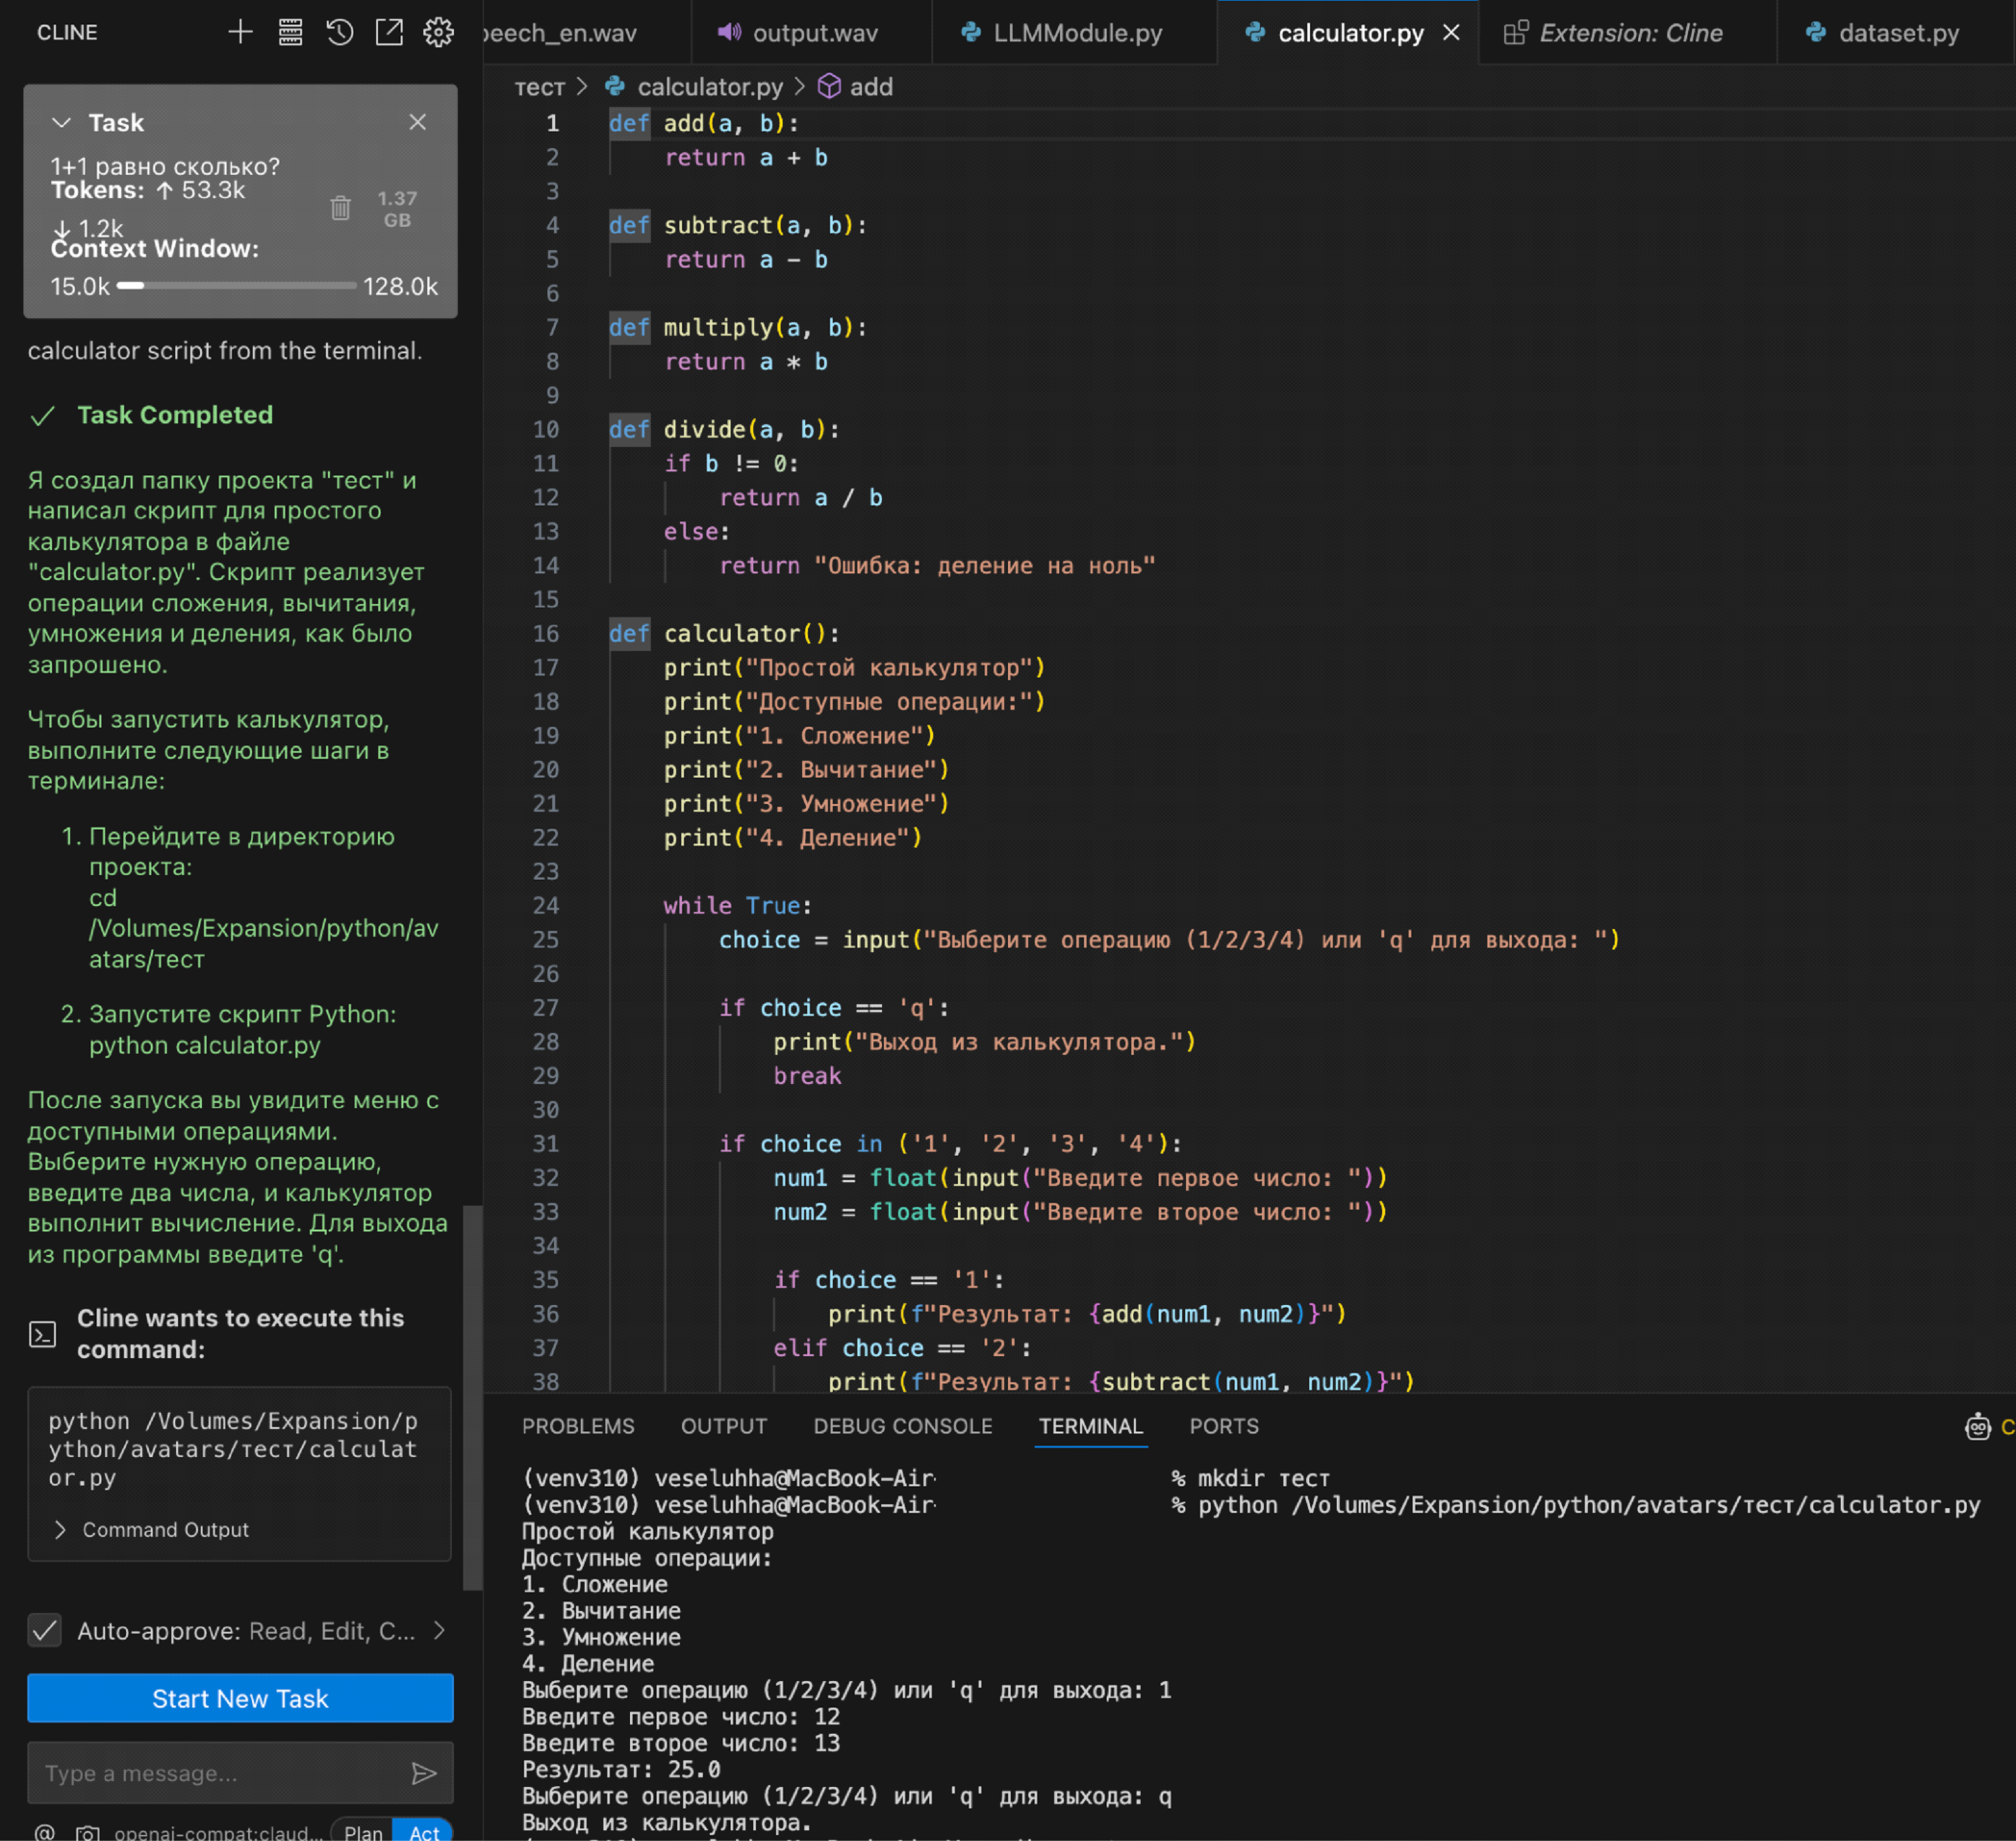
5.1. Create a project folder like "test" in the directory and write a small Python script, for example, for implementing a simple calculator (addition, subtraction, division, multiplication) in the terminal.
5.2. Press Enter or the message send button, and Cline will start working on your request.